How to photograph shoes for product pictures
Wondering how to prepare and present shoes for your product photos? Product images are the decisive factor for your customers. High-quality photos that show the footwear in every detail are essential. But to photograph shoes for product pictures is not that easy. We’ll show you what matters when photographing shoes for product pictures.
Good preparation is important
Freshly cleaned just looks better. Before taking photos the shoes should be as clean as possible. Remove labels, stickers, or tags and also pay attention that the lacing is neat. The better the products are prepared before shooting, the faster also the post-production can be done. Possible signs of wear, stains, scuff marks or dirt, forgotten stickers; all of this and more can be removed during image retouching. Especially leather shoes no longer look brand new due to creases, scratches and folds.
Tip: On the sole or inside the shoe are often information about size and material. Although these are generally helpful, in the pictures they distract from the product itself. This information can be removed in post-production so that you get universal product photos that you can use anywhere; regardless of the size of the photographed shoes.
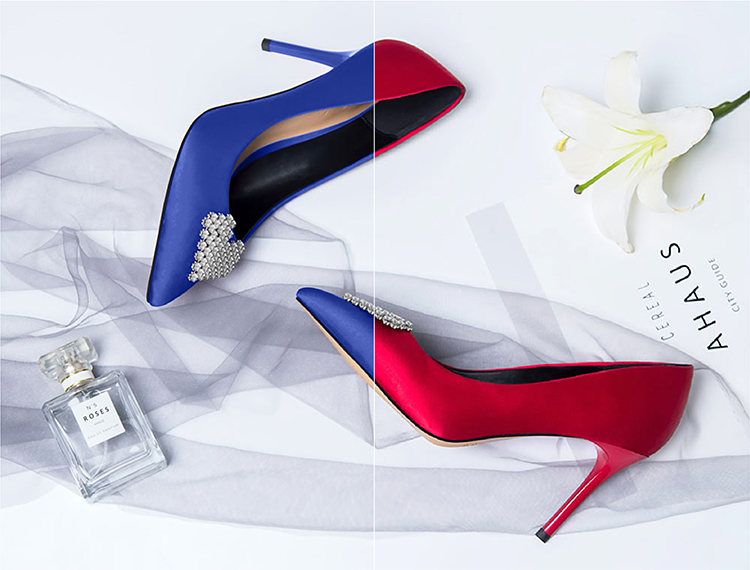
Attractive presentation
Nothing looks more unattractive and boring than a pair of shoes lying limp on the ground. Always position shoes as if they were being worn. Not only does it look more appealing, it also shows its actual shape much better. Accessories such as stands, strings, shoe carriers or crumpled paper for filling help to get the shoes into the right shape and to hold them up. With the so-called ghost model technique, holders can be subsequently removed. Like this, both closed and open shoes can be presented in photos as if they were worn.
The optimal setting
To ensure that the shoes are the center of attention in the photos, the choice of the background and accessories is crucial. A busy background quickly distracts from the product. A light, monochrome background, for example white or light grey, is therefore ideal for pure product photos. This makes clipping easier in post-processing or even eliminates the need for it. For more details about how to choose the perfect background, see our blog “The perfect background for product photos”. Furthermore, do without additional accessories and decorations or reduce them as much as possible.
It also does not work without good lighting. Soft, natural light is best for product photos. Hard, direct light creates unattractive shadows, highlights irregularities and falsifies the colours. If there is no natural daylight available, light boxes, soft boxes and diffusers help to obtain uniform, soft lighting even with artificial light sources.
Ultimately, shoes are also fashion.Additional lifestyle photos are ideal to put the shoes in context, to create a certain mood and to convey the look and feel of the brand. Be it in front of a suitable background, with suitable accessoires, in a real environment, or with real models. As long as the entire setting is coherent and the shoes remain the focus, nothing speaks against creativity.
Enough pictures from enough perspectives
Just like in real life, customers also want to view the product from all angles online. Therefore: Photograph the shoes for your product pictures from as many perspectives as possible. But always stay consistent and photograph each pair of shoes from the same angles.
We recommend: Straight shot from the front and back, individually or in pairs. Straight shot from both sides, individually and as a pair. Angled side shots. One single shot each from above and below. As well as various close-ups to highlight special features; more about that later.
Tip: Shoes are perfect for 360-degree pictures. They make it possible to view the product interactively from every angle. In post-processing, multiple images can be combined to one 360-degree image.
Focus on details
In addition to photos that show the shoe in full size and from all sides, it is important to highlight every detail. The type of leather or fabric, textures, the shape of the heel, laces, eyelets, buckles or zippers … Every detail, no matter how small, is of interest to consumers and should be clearly visible on detailed photos. A high resolution and large image size ensure that the details can also be perfectly recognized with a zoom function.
Colour and material variants are also important details. However, instead of photographing each variant individually and processing each of the images individually, different colours, designs and materials can be displayed with just one initial image using colour masks in post-processing. This not only saves time and money, it also ensures consistency. Learn more about colour masks and maskings.
Sharpness is crucial
The entire product should be in focus and sharp. Soft focus, blurring and the like are not suitable for pure product photos. Only when the image is completely sharp can every detail of the shoes be clearly seen.
Tip: A closed aperture (high f-number) ensures more depth of field and less blurring in the image. A tripod reduces camera shake.
Shoes in image editing and retouching
Once you’re done to photograph the shoes for your product pictures, it’s time for post-processing. Image editing and image retouching gives your product images the finishing touch.
Image enhancements & retouching: Includes, among other things, correction of exposure and white balance. Adjustment of brightness, contrast and tone. Image sharpening and perspective corrections. Align products and crop images. Removing dust, scratches, stains, creases, reflections and annoying elements such as labels, stickers and tags.
Colour correction & recolouring: This includes displaying shoes in accurate colours. Remove colour casts, adjust images, and adjust hue, contrast and saturation. Colour masks for recolouring individual areas of the image and for presenting the same product with one photo in different colour and design variants.
Clippings & Alpha maskings: Cut out shoes precisely with high-quality cut-outs and alpha masks and place them on a white or transparent background, for example. Ideal for further processing, e.g. for composing, and perfect product presentation.
Ghost model: Removal of brackets and cushioning material for an effective presentation of the shoes. With a perfect fit, as if it were being worn by an invisible person.
Shadow effects: Footwear is often presented with a natural shadow or a drop shadow. They add depth to the images and make products look more realistic and appealing.
Extras such as 360-degree images.
We put your shoes in the spotlight. With professional image editing for product photos of the highest quality.
For more information, samples and detailed prices download our e-commerce & product images portfolio.
- 2023
- January (1)
- 2022
- December (2)
- November (1)
- October (2)
- September (2)
- August (1)
- July (1)
- June (1)
- May (1)
- April (1)
- March (1)
- February (1)
- January (3)
- 2021
- December (2)
- November (1)
- October (3)
- September (2)
- August (1)
- July (3)
- June (1)
- May (2)
- April (1)
- March (1)
- February (2)
- January (4)
- 2020
- December (2)
- November (3)
- October (4)
- September (1)
- August (2)
- July (1)
- June (2)
- May (3)
- April (3)
- March (3)
- February (4)
- January (4)
- 2019
- December (1)
- November (2)
- October (5)
- September (1)
- August (3)
- July (2)
- June (2)
- May (3)
- April (2)
- March (3)
- February (2)
- January (4)
- 2018
- December (2)
- November (2)
- October (3)
- September (3)
- August (2)
- July (2)
- June (2)
- May (1)
- April (1)
- March (2)
- February (3)
- January (2)
- 2017
- December (2)
- November (2)
- October (1)
- September (1)
- August (1)
- July (1)
- June (1)
- May (1)
- April (1)
- March (1)
- February (1)