How to shoot jewellery for glamorous product images
When it comes to jewellery, it is all about the details. Beautiful, high-quality photos that showcase these details are essential. At the same time, jewellery is difficult to photograph. We present you simple techniques to obtain sparkling results.
Preparation is everything
First remove all tags, stickers, strings etc. from the products and examine them carefully. Is anything broken? Are there parts or gems missing? If possible, fix everything before the shoot. The shinier the better. That is especially true for jewellery. All products should be clean, dust free and polished. Don’t be sloppy! Most imperfections can be removed in post-production. Advanced editing is time-consuming and requires skills. Careful preparation saves time and money.
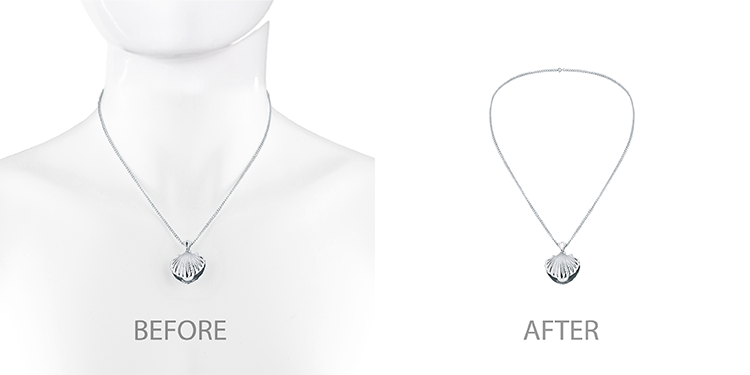
Props & Accessories
Editorial shoots for branding purposes like magazine covers, banners, website images and the like require appropriate props (models, location, stylish accessories etc.). But when it comes to product images, props and accessories usually tend to distract from the product. The jewellery is the highlight. Use as minimal props as possible that can easily be removed in post-production. Small stand ups, mannequins and busts hold the items upright. They are removed afterwards, for example, using the ghost model technique.
Another option is to place the jewellery on a flat surface. Neutral, light background colours like white or grey avoid distractions and give the images a timeless look. Black backgrounds are popular for jewellery, but difficult at some marketplaces. To be sure, check our guide for convincing product images.
Proper lighting
Shadows, reflections and visible imperfections are often the result of unflattering lighting. Diffuse and soft light is best. Usually, two light sources are already sufficient. A small light tent makes it easier to continuously create the same lighting situation, to reduce glare and to control shadows.
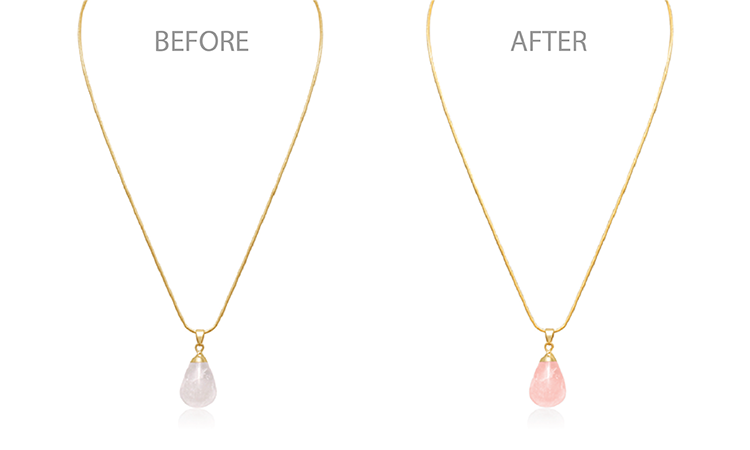
Check the white balance
Different backgrounds, lighting and white balance make colours look different or completely wrong. To capture the colours as realistic as possible, a correct white balance is required. This is set either automatically or manually.
Reflections, reflections, reflections
Shiny jewellery is beautiful. But means many visible reflections and white highlights, be it from a light source, the camera or the photographer. And this can ruin the whole image. As they are not only distracting, but may look like a flaw. To avoid reflections, change the camera position in relation to the light source or try to zoom in a bit. Everything that remains is edited subsequently.
Sparkles everywhere
Unlike reflections sparkling jewellery is desired. In order to light up faceted gems and diamonds, the light must fall directly on the stones. This works best when the light source is in the same position as the camera. There are special light bulbs to create the perfect sparkle without unwanted reflections. Or let it shine in post-production.
Keep everything in focus
Sharp and crisp images are a must. A tripod prevents avoids camera shake. Avoid images with a shallow depth of field because this means that only a part of the product is in focus. Customers want to see everything. Take pictures with aperture f/11 or higher (small aperture) to achieve a large depth of field, sharpness and to keep every detail in focus.
Have enough images
After setting all up, don’t just take one or two photos. The more pictures, the more trust, the more sales. We recommend at least: straight from the front, angled from the front, top view, close-up detail shots. Take as many pictures as possible from many angles.
Stay consistent
Inconsistency is confusing, distracting and looks unprofessional. Consistency keeps the focus on the products, creates a unique look, a professional overall impression and trust. Choose a style for your pictures and stick to it. And create guidelines and templates, for the photo shoot as well as for post-processing. Integrate everything: camera settings, background, lighting, positions, angles, product alignments, margins, image size, cropping, and more. And also keep the guidelines from different marketplaces in mind.
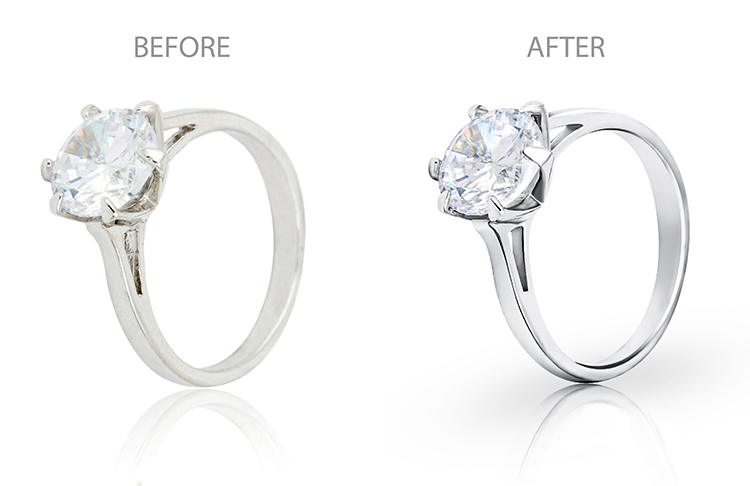
Don’t skip professional image editing
Image editing and retouching should always be the final step for every product image. Don’t let poorly retouched pictures ruin all your efforts. Whether remove imperfections, clippings, colour correction, change backgrounds, add sparkles, subtle shadows and more, rely on professionals.
Br24 – Our team of experts makes every jewel shine!
Read all about perfect product images of clothing here.
- 2023
- January (1)
- 2022
- December (2)
- November (1)
- October (2)
- September (2)
- August (1)
- July (1)
- June (1)
- May (1)
- April (1)
- March (1)
- February (1)
- January (3)
- 2021
- December (2)
- November (1)
- October (3)
- September (2)
- August (1)
- July (3)
- June (1)
- May (2)
- April (1)
- March (1)
- February (2)
- January (4)
- 2020
- December (2)
- November (3)
- October (4)
- September (1)
- August (2)
- July (1)
- June (2)
- May (3)
- April (3)
- March (3)
- February (4)
- January (4)
- 2019
- December (1)
- November (2)
- October (5)
- September (1)
- August (3)
- July (2)
- June (2)
- May (3)
- April (2)
- March (3)
- February (2)
- January (4)
- 2018
- December (2)
- November (2)
- October (3)
- September (3)
- August (2)
- July (2)
- June (2)
- May (1)
- April (1)
- March (2)
- February (3)
- January (2)
- 2017
- December (2)
- November (2)
- October (1)
- September (1)
- August (1)
- July (1)
- June (1)
- May (1)
- April (1)
- March (1)
- February (1)