How to shoot clothing for product pictures
High quality, appealing pictures of products are key in e-commerce. Presenting clothes online can be tricky. And there is a big difference between editorial fashion photography (seen in magazines and advertising) and product shots for a website or online shop. We show you, how to shoot perfect clothing pictures.
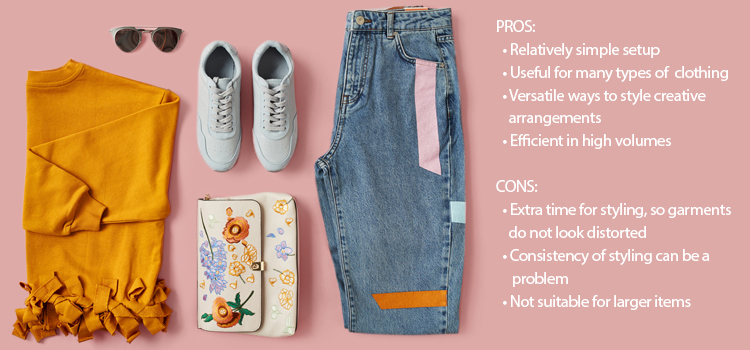
The Flat Lay
The flat lay, or tabletop, is a relatively simple way of photographing clothes. With a basic setup and versatile possibilities in styling. The garments are arranged laid out flat on a table or on the floor and photographed from above. Tools such as pins, clips or adhesive tape are used to shape the products. It is also common to stuff clothes with crumpled fabric, paper or small air cushions. This gives the garments the desired look. And at the same time, adds more depth to the photos. Photographs are mostly taken on a white or plain coloured background, which is removed in post-production using clipping paths.
There are many ways to style the flat lay and it is useful for many types of clothing. And is also often used for creative compositions or collages, as they are often seen at Instagram, for example.
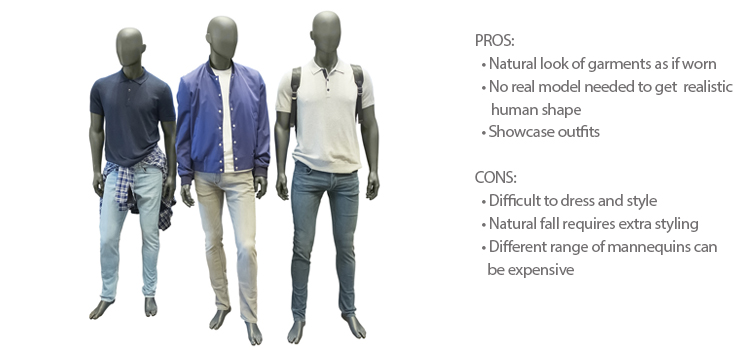
Mannequin
Clothes look most natural when worn. And to demonstrate the worn form of garments, the presentation on a mannequin is very useful. They give the products a realistic human shape, without the hassle of finding a model for each photo shooting. For a perfect fit, tools such as clips and needles are also used here. However, it is not always easy to dress and style mannequins. And especially the natural fall of the clothes is sometimes difficult. For example, armless mannequins should be avoided to give the sleeves a realistic form. There are various types of mannequins to present different types of garments. Like this even whole outfit combinations can be showcased.
To use the images afterwards, the background is usually removed in the post-production process. And even the mannequin itself can be removed. Which leads to the next point.
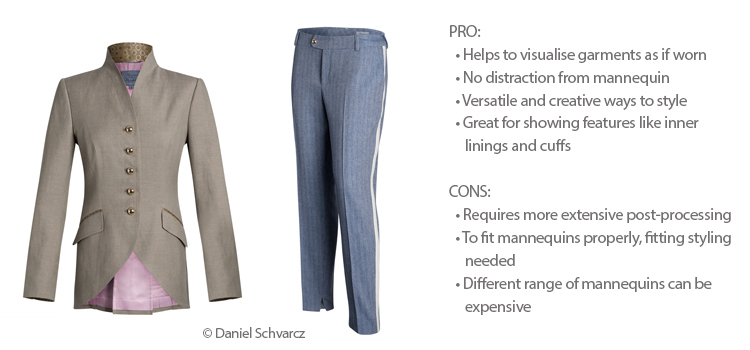
Ghost Model
Also known as Ghost/Invisible Mannequin or Hollow Man Effect. The garments are styled on a mannequin, which is removed in post-production. This gives the clothes the feeling as if they are worn by an invisible model. To achieve this effect, normally at least two photos are digitally composed together during image editing. One images shows the front of the item. While another picture, shot from the same angle, shows the inside. Using clipping paths the inside view is then placed at the location where it would appear if the mannequin would be invisible.
This method is, for example, especially handy for outerwear, where it is important to show off details like the inner lining. But nearly every garment can be effectively presented this way. To achieve a good final output, professional post-processing is indispensable. In our blog post “Ghots Model – How it works” we peak over the shoulder of our production team and show how the technique works in detail.
Live Model
To give the products a more editorial feeling, the presentation with a live model is best. It not only shows how articles look on a human body or are meant to be used and styled. Models can also represent a certain lifestyle for the customers. The choice of models, styling, style and setting can be used to create a certain mood for a brand, to give the products personality and to represent the targeted customers.
Live models are suitable to present whole collections, outfits and accessories.
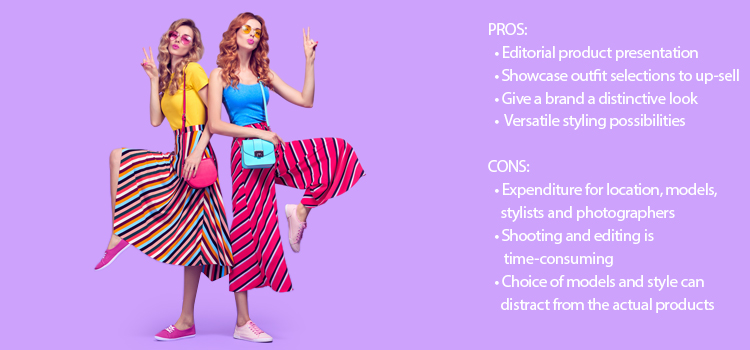
Often, a combination of live models, flat lay and (ghost) mannequins is chosen to showcase products. This might seem costly, but offers a wide range of images.
Image editing and retouching
Professional post-processing is important to ensure highest quality, consistency and perfect images. And should always be the final step for any product image.
This includes, among others: High-quality clippings and maskings. Removing backgrounds, props and imperfections such as stains, wrinkles, reflections, glare. Beauty and product retouching, colour correction, correction of lighting and white balance. Presentation of products in different colour variations. And creating the ghost mannequin effect.
Guidelines for editing and retouching help to stay consistent, to optimise workflows and to create a unique look and feel.
More tips about product images can be found in “Our guide to convincing product images”.
Br24 – Your professional partner for image editing and more, always in the highest quality!
- 2023
- January (1)
- 2022
- December (2)
- November (1)
- October (2)
- September (2)
- August (1)
- July (1)
- June (1)
- May (1)
- April (1)
- March (1)
- February (1)
- January (3)
- 2021
- December (2)
- November (1)
- October (3)
- September (2)
- August (1)
- July (3)
- June (1)
- May (2)
- April (1)
- March (1)
- February (2)
- January (4)
- 2020
- December (2)
- November (3)
- October (4)
- September (1)
- August (2)
- July (1)
- June (2)
- May (3)
- April (3)
- March (3)
- February (4)
- January (4)
- 2019
- December (1)
- November (2)
- October (5)
- September (1)
- August (3)
- July (2)
- June (2)
- May (3)
- April (2)
- March (3)
- February (2)
- January (4)
- 2018
- December (2)
- November (2)
- October (3)
- September (3)
- August (2)
- July (2)
- June (2)
- May (1)
- April (1)
- March (2)
- February (3)
- January (2)
- 2017
- December (2)
- November (2)
- October (1)
- September (1)
- August (1)
- July (1)
- June (1)
- May (1)
- April (1)
- March (1)
- February (1)