Clippings explained!
What are clippings and how are they created?
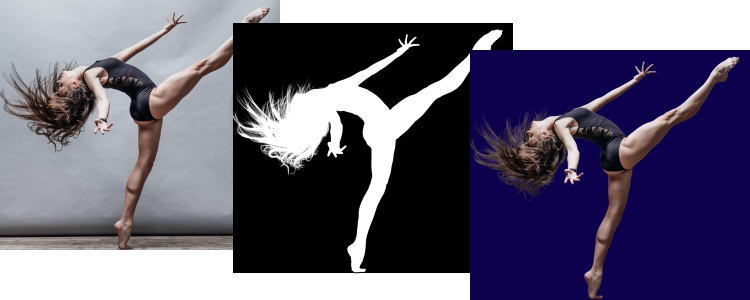
A clipping is a cut-out or “stand-alone” image motif. During the editing process, the object to be cropped is detached from its original background, the background is removed and the result is a free, stand-alone motif; a clipping. Typically a clipping is on a transparent background
This is how clippings are created
The object to be cropped is separated from the background using a single vector path, the so-called “simple path”, which surrounds the entire object. The original background can then be hidden or completely removed. The cut-out object can, for example, be placed separately on a new background or within a composing.
A so-called clipping path or active path includes additional information about which image areas are to be clipped (cropped) and which are to be hidden. To do this, the simple path needs to be activated or defined as a clipping path. The image itself remains unchanged, for example, in the result the background is still visible.
Often times, both a simple path and a clipping path are referred to as clipping paths. But only with an “active” clipping path, for example, layout programs such as InDesign automatically hide the background when importing the image and only display the cut-out object. Not all file formats are suitable for active clipping paths, but more on that later.
5 clipping tools at a glance
In digital image editing, there are different tools for clipping. But not every tool is suitable for every motif and leads to a satisfactory result. Depending on the selected tool, the quality of the clipping and the processing time can differ considerably. Let’s take a look at five different Photoshop clipping tools.
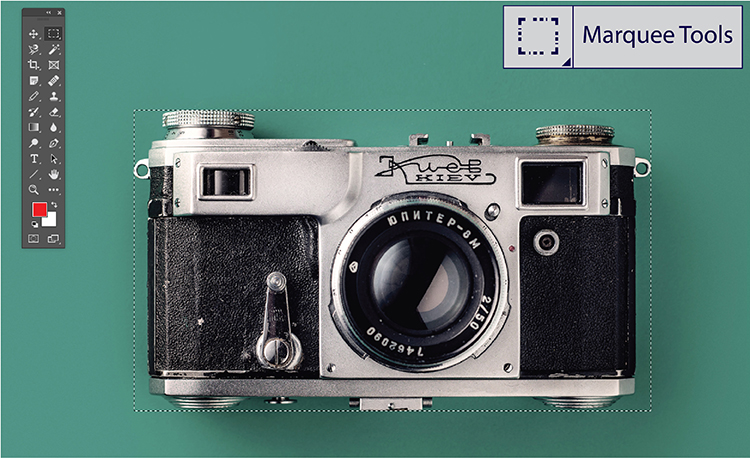
Marquee Tools
Using the Marquee Tools, a simple geometric selection can be made. The selection can be either rectangular or elliptical. Creating clippings with the Marquee Tools is a very easy clipping method, but it only works for even objects with a corresponding geometric shape.
Magic Wand Tool
The Magic Wand Tool is suitable for images with rather few details and large, uniformly coloured image areas. By clicking on an image area, the Magic Wand Tool measures the colour value of this spot and automatically selects all surrounding pixels with a similar colour value. The Magic Wand Tool offers a quick way of clipping. However, the quality depends very much on the original image, is often inaccurate and requires manual corrections.

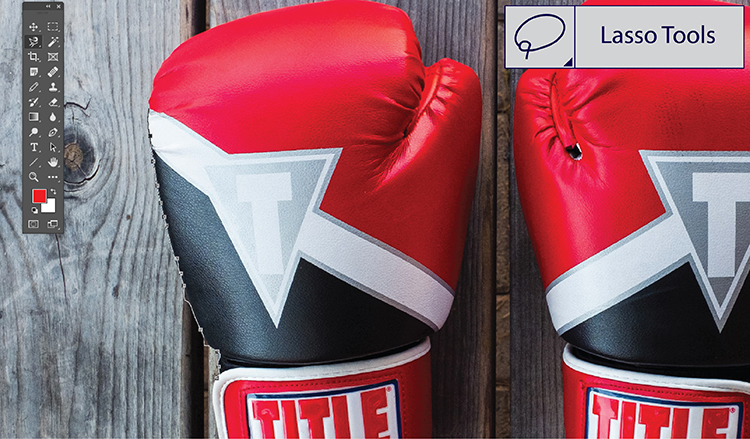
Lasso Tools
The different Lasso Tools work similar to the Magic Wand Tool. The selection is made based on colour values or by gradually dragging the cursor along the edges of the object to be cut out. The path is automatically placed around the object and can be refined afterwards. Since only straight lines are possible to create the path, the masking quickly becomes too angular and therefore inaccurate. High-contrast motifs, few details and sharp contours are prerequisite for a satisfactory quality when clipping with the Lasso Tools.
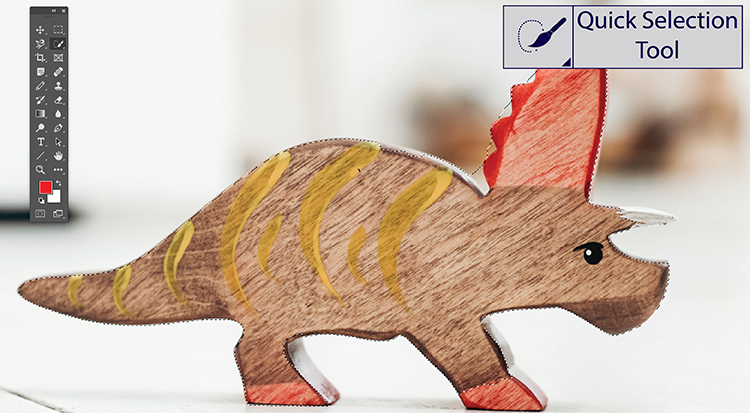
Quick Selection Tool
The Quick Selection Tool uses the Brush Tool for editing, with which the selection is manually “painted” over the image. With this method, too, the selection is made using image areas with similar colour values. The Quick Selection Tool automatically adjusts the selection based on the similar colour tones. This enables to create a large, detailed selection relatively quickly. This tool works well for objects with simple structures, simple backgrounds, and clear outlines. If the edges are fuzzy, the selection quickly becomes imprecise.
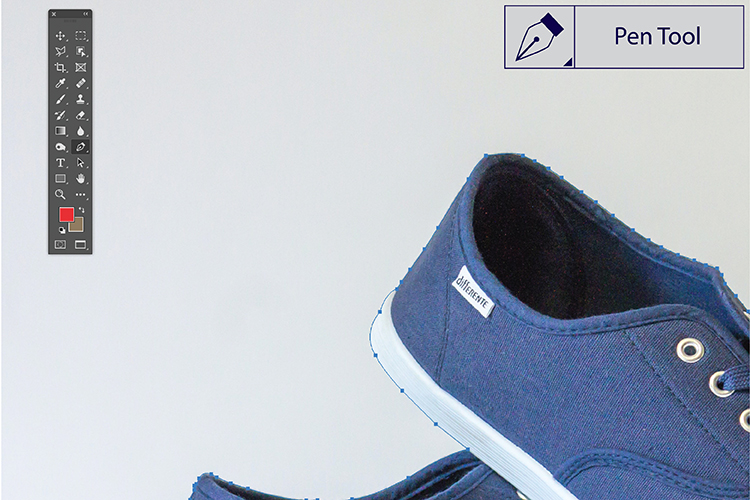
Pen Tool
The Pen or Path Tool is the most common and most precise tool for clipping objects with clear outlines, straight and round edges. A closed work path with so-called anchor points is set step by step around the object to be cut out. The individual path segments between the anchor points can be curved by adjustments at the anchor points, which means that even curves can be captured precisely. If the work path is closed, the selection is created and the path is detached from the background.
The type of background is of secondary importance with this clipping method. The sharper the contours of an object, the easier it is to create a path. Clipping with the Pen Tool is very precise manual work and the best solution for high-quality clippings.
Which file format?
If the edited image is saved in JPEG, TIFF or PSD format, the path is retained and can be selected and adapted again and again. The PNG format, however, cannot contain a path, but is the ideal choice for a transparent background, for example. If you are not sure which file format is best for you, we are here to help.
What else is there?
For motifs with fine details in the contour and semi-transparent areas, for example hair, fur or even textiles, clipping with a path is not sufficient to perfectly remove the background. Due to the hard contours of a clipping path, many details are quickly lost. The option to modify the path or the selection and to smoothen the edge of the path is also unsuitable in most cases, since details are lost by blurring the edges. Filigree and complex objects are therefore cut out using alpha maskings, which enable soft transitions at the edges and thus the cut out of even the finest image details. We have put together everything you need to know about alpha maskings.
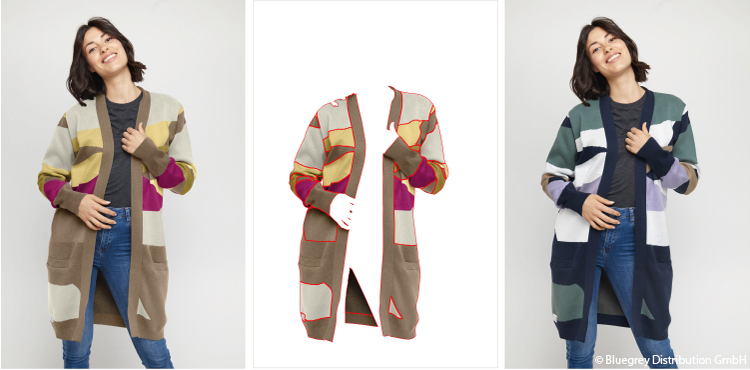
If a single path or an alpha masking is not sufficient for the further processing of a motif, then maskings are used. Maskings separate individual image elements from one another using separate masking paths. As a result, it is possible to edit or change the elements individually and, for example, to perform colour adjustments (colour masking). You want to know more precisely, no problem. Here you will find all the answers to the question “What are maskings?”. Especially for displaying different product variants, clippings are often created using maskings.
Depending on the complexity of the images, a different tool or method is used to create clippings. Often only the combination leads to an optimal result.
How do clipping, alpha masks and maskings differ? When is which method best suited? A detailed overview and a comparison of these three clipping methods will soon be available in our blog.
Without clippings, (almost) nothing works
Image retouching, colour correction and recolouring, image optimisation, adding shadows and reflections, vectorization… Clippings are the basis of many image editing processes. In fact, clipping is one of the most frequently used processes in digital image editing. Clippings are also used in many areas of application. Layouts, composings, advertisements, portrait photography, product presentation for online and print… Whenever it comes to depicting objects, people or other image components without a background, there is no way around clippings. Especially the visual product presentation in e-commerce cannot do without clippings.
Looking for the best clippings in the highest quality? Look no further. We cut-out everything that you need.
Our services include: clipping, alpha masking, masking, composing, ghost model, image retouching, colour correction, layout design, CGI for e-commerce, and more.
For more information, samples and detailed prices download our e-commerce & product images portfolio.
- 2023
- January (1)
- 2022
- December (2)
- November (1)
- October (2)
- September (2)
- August (1)
- July (1)
- June (1)
- May (1)
- April (1)
- March (1)
- February (1)
- January (3)
- 2021
- December (2)
- November (1)
- October (3)
- September (2)
- August (1)
- July (3)
- June (1)
- May (2)
- April (1)
- March (1)
- February (2)
- January (4)
- 2020
- December (2)
- November (3)
- October (4)
- September (1)
- August (2)
- July (1)
- June (2)
- May (3)
- April (3)
- March (3)
- February (4)
- January (4)
- 2019
- December (1)
- November (2)
- October (5)
- September (1)
- August (3)
- July (2)
- June (2)
- May (3)
- April (2)
- March (3)
- February (2)
- January (4)
- 2018
- December (2)
- November (2)
- October (3)
- September (3)
- August (2)
- July (2)
- June (2)
- May (1)
- April (1)
- March (2)
- February (3)
- January (2)
- 2017
- December (2)
- November (2)
- October (1)
- September (1)
- August (1)
- July (1)
- June (1)
- May (1)
- April (1)
- March (1)
- February (1)