What is Colour Correction?
Professional Colour Correction, explained in a simple way
Colours are a complex topic, not only in photography, but also in image editing. To capture the colours in a photo exactly as they were in the moment the photo was taken is extremely difficult. Various factors affect the colour output: location, camera position, lighting conditions, even the choice of camera or film. So the result often does not reflect the actual colours.

Therefore, colour correction plays an extremely important role. Whether removing colour casts, improving the colour impression and the overall impression of an image, adding colour effects and more.
Colour Correction or Colour Grading?
In the context of image editing, the term “Colour Correction” basically unites two procedures: colour correction in general and colour grading. Both include different processing steps and purposes, but the two interlock seamlessly and in many cases are summarised as colour correction.
So, what is what?
General colour correction is about correcting colours so that they correspond exactly, or as closely as possible, the actual colours at the time the photo was taken. Colour casts, too bright, too dark, washed out, matching photos (colours can differ from one photo the the next) … this is part of colour correction. So rather technical corrections.
Colour grading involve adjusting and enhancing hues, contrasts, saturation, the use of filters and more, with the aim of supporting (or even changing) the message of the image, creating moods. So rather an artistic, creative editing. A prerequisite is an accurate colour output, which is ensured by the previous correction of the colours.
To sum it up:
– Colour Correction: Correction of colours for accurate output.
– Colour Grading: Additional adjustments/improvements to support or change the image message, create moods etc.
– One does not work without the other (at least that is how it should be).
– Image editing usually combines both procedures as colour correction. We do not make a distinction either, the individual task is decisive for processing.
Colour correction techniques
Various techniques and tools are used for colour correction. They can lead to the desired goal in different ways and are often combined for a perfect result.
Correcting the white balance
A blue cast in a photo taken at strong sunlight? Unwanted colour casts are often caused by incorrect white balance at the time of the shooting. However, this can be corrected subsequently. For colour balance, the editor specifically searches for an image point that represents maximum white, the white point. In addition, usually also a point with maximum black. Professionals also detect medium grey points. Based on the selected points, the software redetermines the colour distribution in the image. At best, the colour cast is removed afterwards. However, further or combined corrections are often necessary for a perfect result.
The histogram
So the first step is always the control and correction of highlights and shadows of an image: white point, black point and the mid-tones. An important tool for this is the histogram.
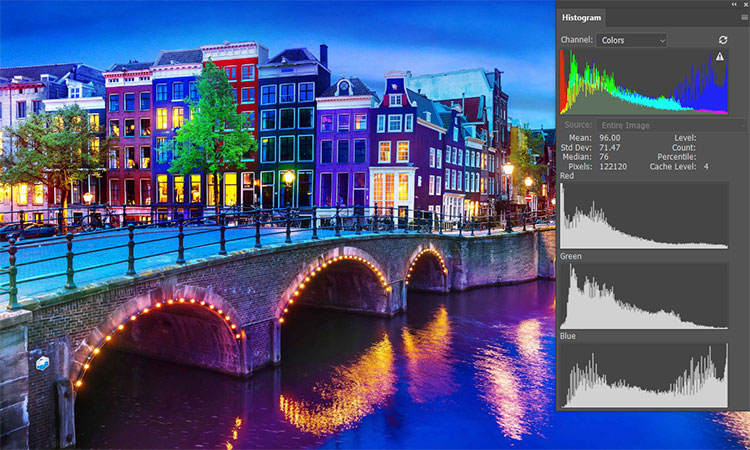
The histogram is a graphic representation of the tonal range distribution and frequency in an image. Shadows in the left part, mid-tones in the middle, and highlights in the right part. It provides information on whether and which corrections are necessary. The individual curves show the distribution of the overall range of brightness values as well as the brightness values of the separate colour channels (RGB: Red, Green, Blue). Bright images have high peaks on the right, dark images on the left. Images with a balanced exposure usually do not show distinctive peaks. If the curves start right at the edge with high peaks, this is an indicator for overexposure (high peak on the right) or underexposure (high peak on the left). A high contrast also leads to peaks. As a result, details in the shadows and highlights are lost. Using the histogram helps to determine appropriate tonal corrections.
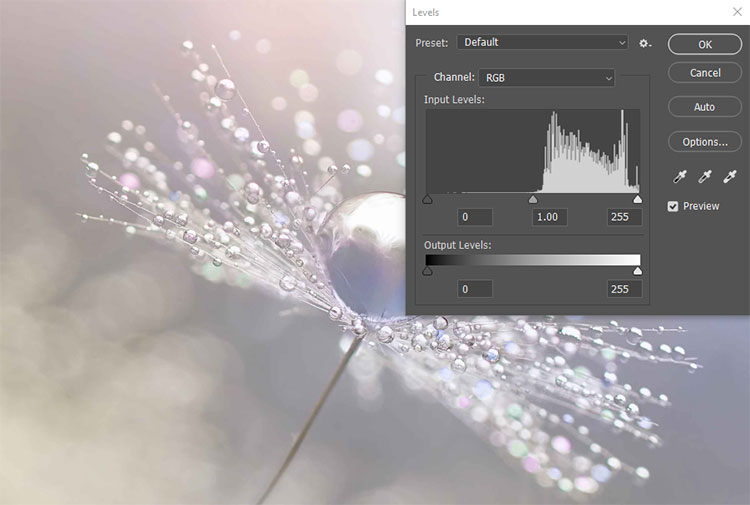
Tonal corrections and colour curves
The tonal correction (in Photoshop: “levels”) offers various possibilities for colour correction. It focuses primarily on the optimisation of colour and tonality in relation to brightness and darkness (that means highlight and shadows) as well as and contrast. Among other things, white and black tones and in most cases also the mid-tones are adjusted manually. As a result, the tonal ranges of the image are redistributed and, for example, the image is lightened, darkened or the contrast is enhanced. In order to eliminate a colour cast, adjustments are made in the individual colour channels.
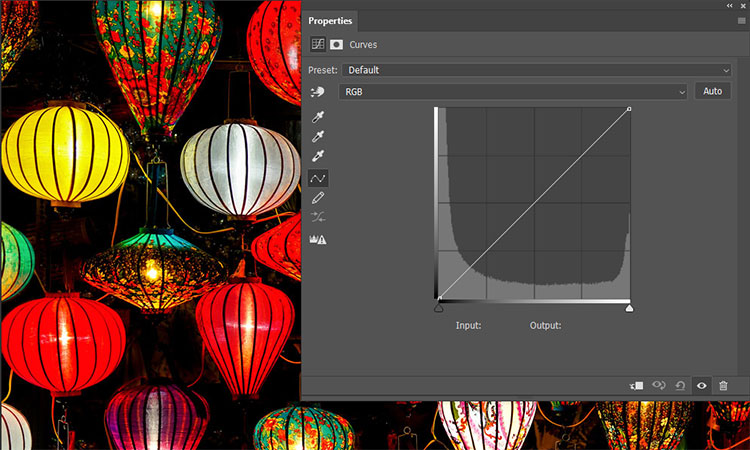
Adjustments that are made using the tonal correction can also be achieved with the colour curves, or curves for short. They offer even more precise options for colour corrections. The tonal correction enables adjustments for the entire image. With the help of the curves, individual brightness and tonal ranges can be corrected in a targeted manner. In this way it is possible, for example, to lighten areas of an image that are too dark without affecting other areas that are already bright enough and which would otherwise be too bright. White balance or colour casts can also be corrected more precisely. The ability to increase contrast without losing details in light and dark areas is another major advantage of the gradation curves over tonal correction.
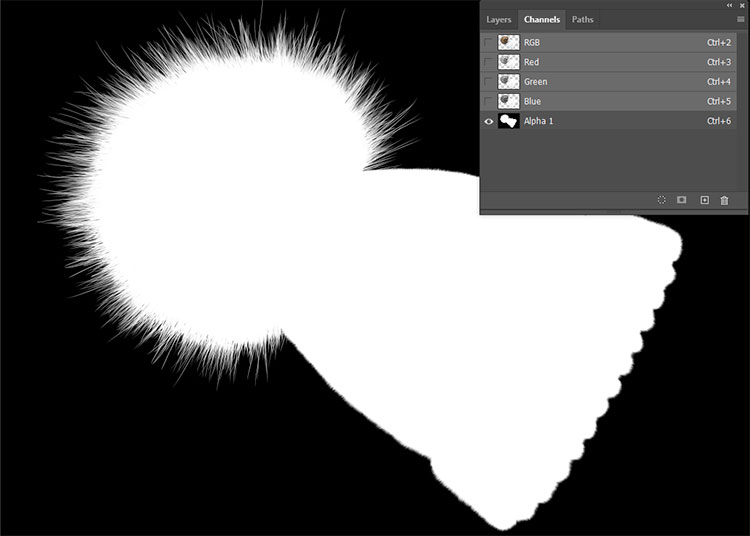
Recolour with colour masks
Changing colours is also part of colour correction. So-called colour masks are particularly interesting for companies and photographers in the e-commerce and printing industry. During editing, certain areas of an image are selected and masked. These areas can then be adjusted separately and, for example, recoloured. For example, it is possible to show the same article in various colour and design variants without the need for new photos. As a result, the finished images not only look uniform, this type of implementation is also much faster and cheaper.
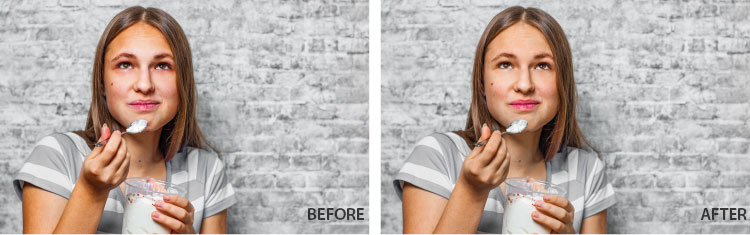
Optimise skin tones
Adjusting skin tones has become standard in the fashion and beauty industry. This includes, among other thing, the optimisation of the overall skin colour, the removal of red spots and minor blemishes or the correction of irregular make-up.
Other areas of application for colour correction
– Selective adjustment, correction of individual colours and image sections.
– Influencing the colour saturation for bright colours.
– Improving the colour balance.
– Enhancing almost lost details from underexposed or overexposed areas.
– Shifting the colour values to change the expression of an image.
– Adding creative colour effects.
Professional colour correction for perfect results
Image editing programs offer various auto-correction function for colour correction. However, the results are often unsatisfactory because, for example, the precise analysis of the tonal range distribution and appropriated corrections are missing. Professional colour correction guarantees perfect results.
- 2023
- January (1)
- 2022
- December (2)
- November (1)
- October (2)
- September (2)
- August (1)
- July (1)
- June (1)
- May (1)
- April (1)
- March (1)
- February (1)
- January (3)
- 2021
- December (2)
- November (1)
- October (3)
- September (2)
- August (1)
- July (3)
- June (1)
- May (2)
- April (1)
- March (1)
- February (2)
- January (4)
- 2020
- December (2)
- November (3)
- October (4)
- September (1)
- August (2)
- July (1)
- June (2)
- May (3)
- April (3)
- March (3)
- February (4)
- January (4)
- 2019
- December (1)
- November (2)
- October (5)
- September (1)
- August (3)
- July (2)
- June (2)
- May (3)
- April (2)
- March (3)
- February (2)
- January (4)
- 2018
- December (2)
- November (2)
- October (3)
- September (3)
- August (2)
- July (2)
- June (2)
- May (1)
- April (1)
- March (2)
- February (3)
- January (2)
- 2017
- December (2)
- November (2)
- October (1)
- September (1)
- August (1)
- July (1)
- June (1)
- May (1)
- April (1)
- March (1)
- February (1)