All about 360 degree images
Is it worth it? Definitely!
360 degree images are a great way to present your products, to offer your customers an interactive experience; and even more.
360 degree images:
– generally improve product visibility because they attract attention.
– improve the customer experience, offer interactivity and strengthen customer loyalty.
– make the entire product visible, from all sides and with all details.
– help consumers understand products better. The better informed consumers are, the greater their trust. Because they know exactly what they are getting.
– decrease product returns and increase sales.
– make you different from others.
– can be integrated in websites, online shops, e-commerce marketplaces and more.
All in all, 360 degree product photos are one of the most effective ways to promote your products.
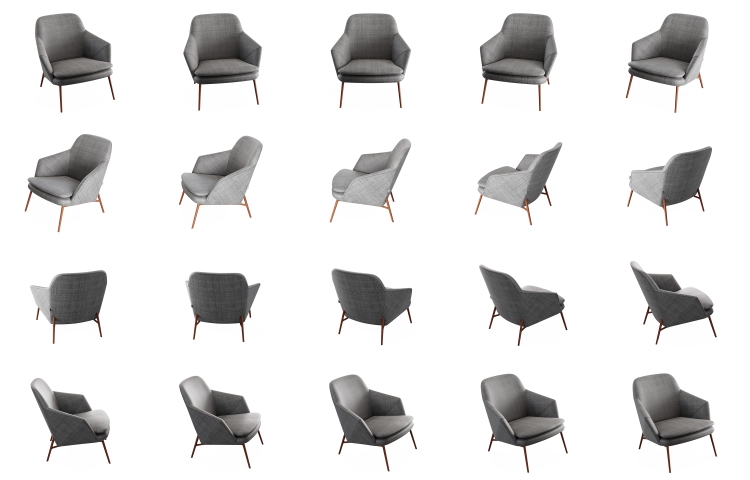 |
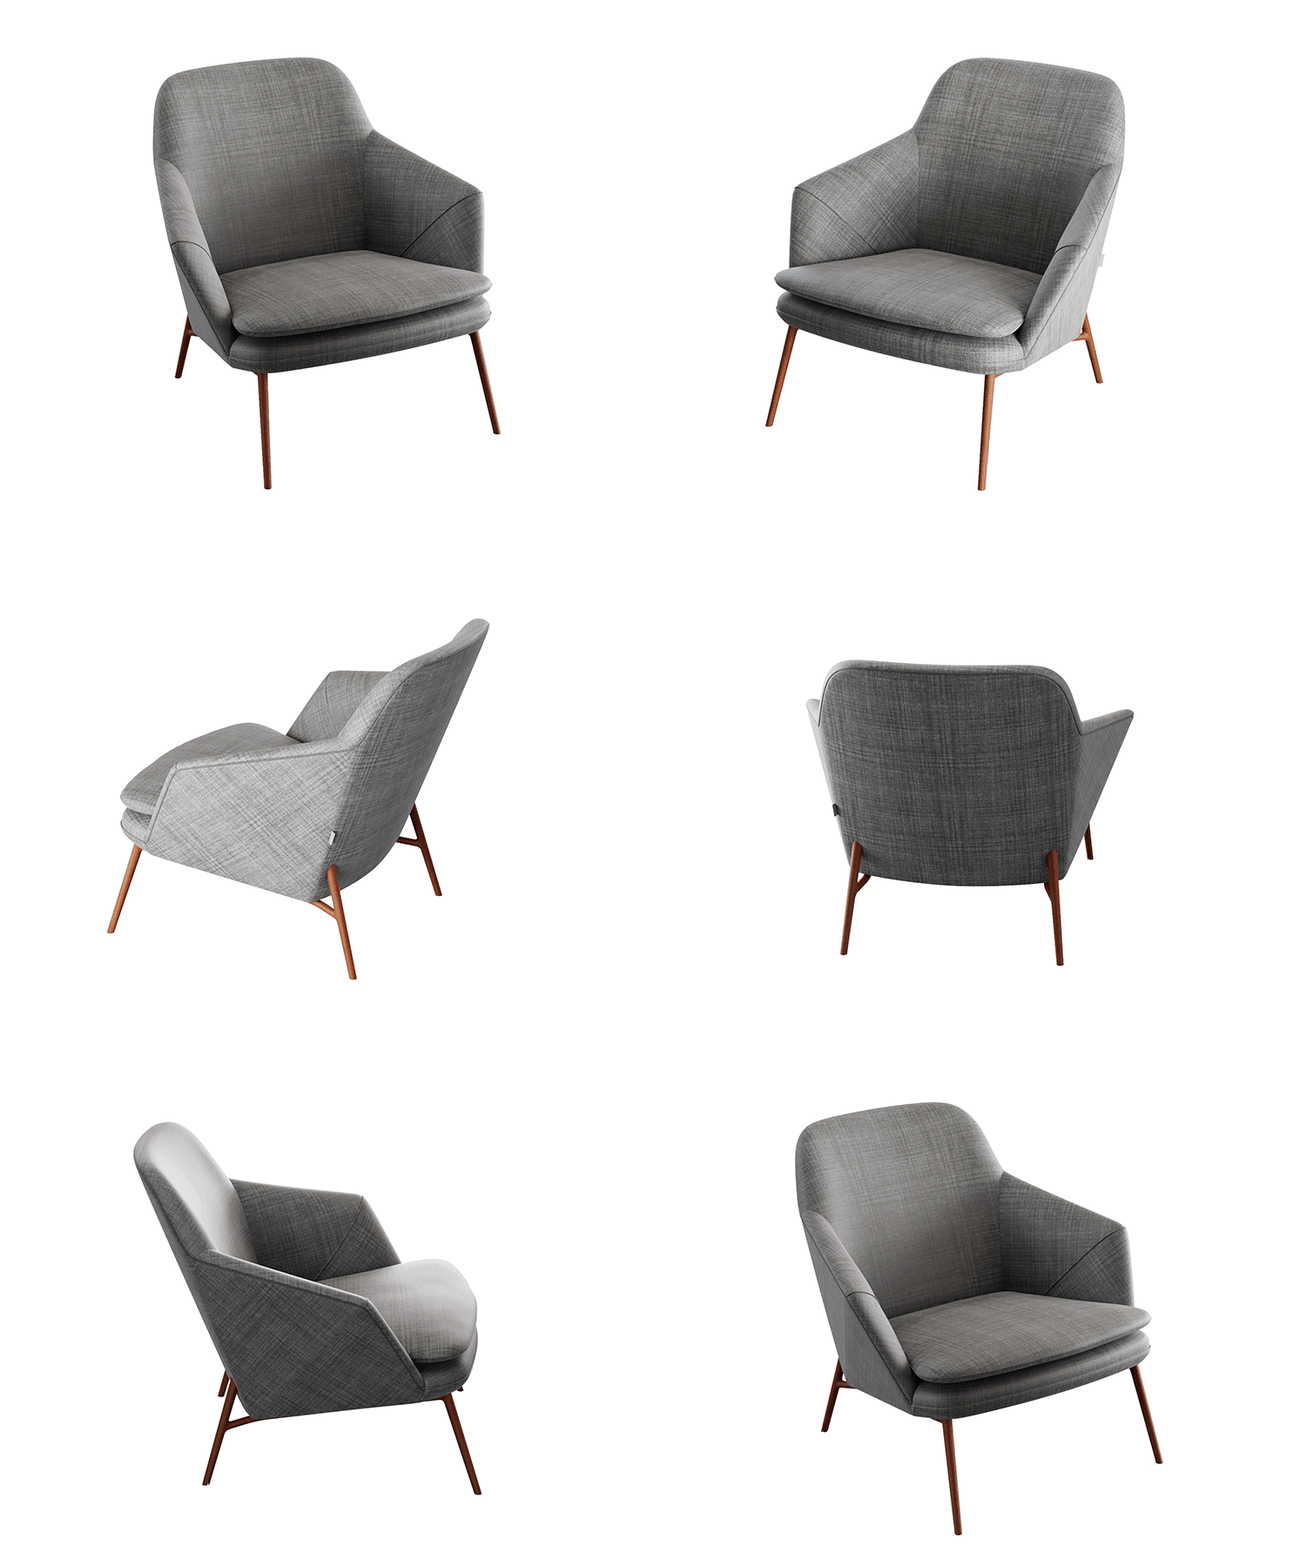 |
“Arm chair / Furniture” by maxsbond.work is licensed under Creative Commons Attribution.
Which products are suitable?
As many advantages as 360-degree images offer, you still need to consider whether your product is suitable for it and whether it will benefit from this type of presentation.
In particular, products that are multi-dimensional and have features on several sides that consumers want to see benefit from a 360-degree presentation. For example backpacks, furniture, sports equipment, clothing, technical items. Also products with important information on labels, such as cosmetics, car polish, chemical products, etc., profit from a completely new form of product label visibility through 360 degree images. In the case of single-dimensional, flat products (e.g. plates, cutting boards, envelopes, socks), where the appearance and features are obvious, 360 degree images are not advantageous.
360, 3D or 3D animated?
The terms 360 degree (or 360°) and 3D photography are often used synonymously. In fact, however, they differ technically and in the end result. In general, both 360° and 3D photography fall under the so-called “spin photography” or “rotation photography”. Spin photography is a photographic technique in which a series of individual images, usually between 24 or 72 photos, are stitched together to create the impression of a rotating, spinning object.
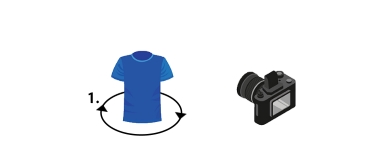
360 degree photography: The product is photographed all around on one level, this means 360 degrees. The product rotates once around itself while the camera takes individual pictures (1.). We’ll take a closer look at how this works in a moment. The end result can be rotated 360 degrees to the left and right. |
 |
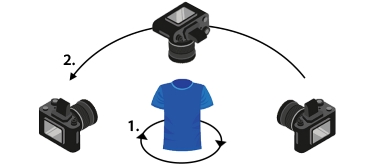
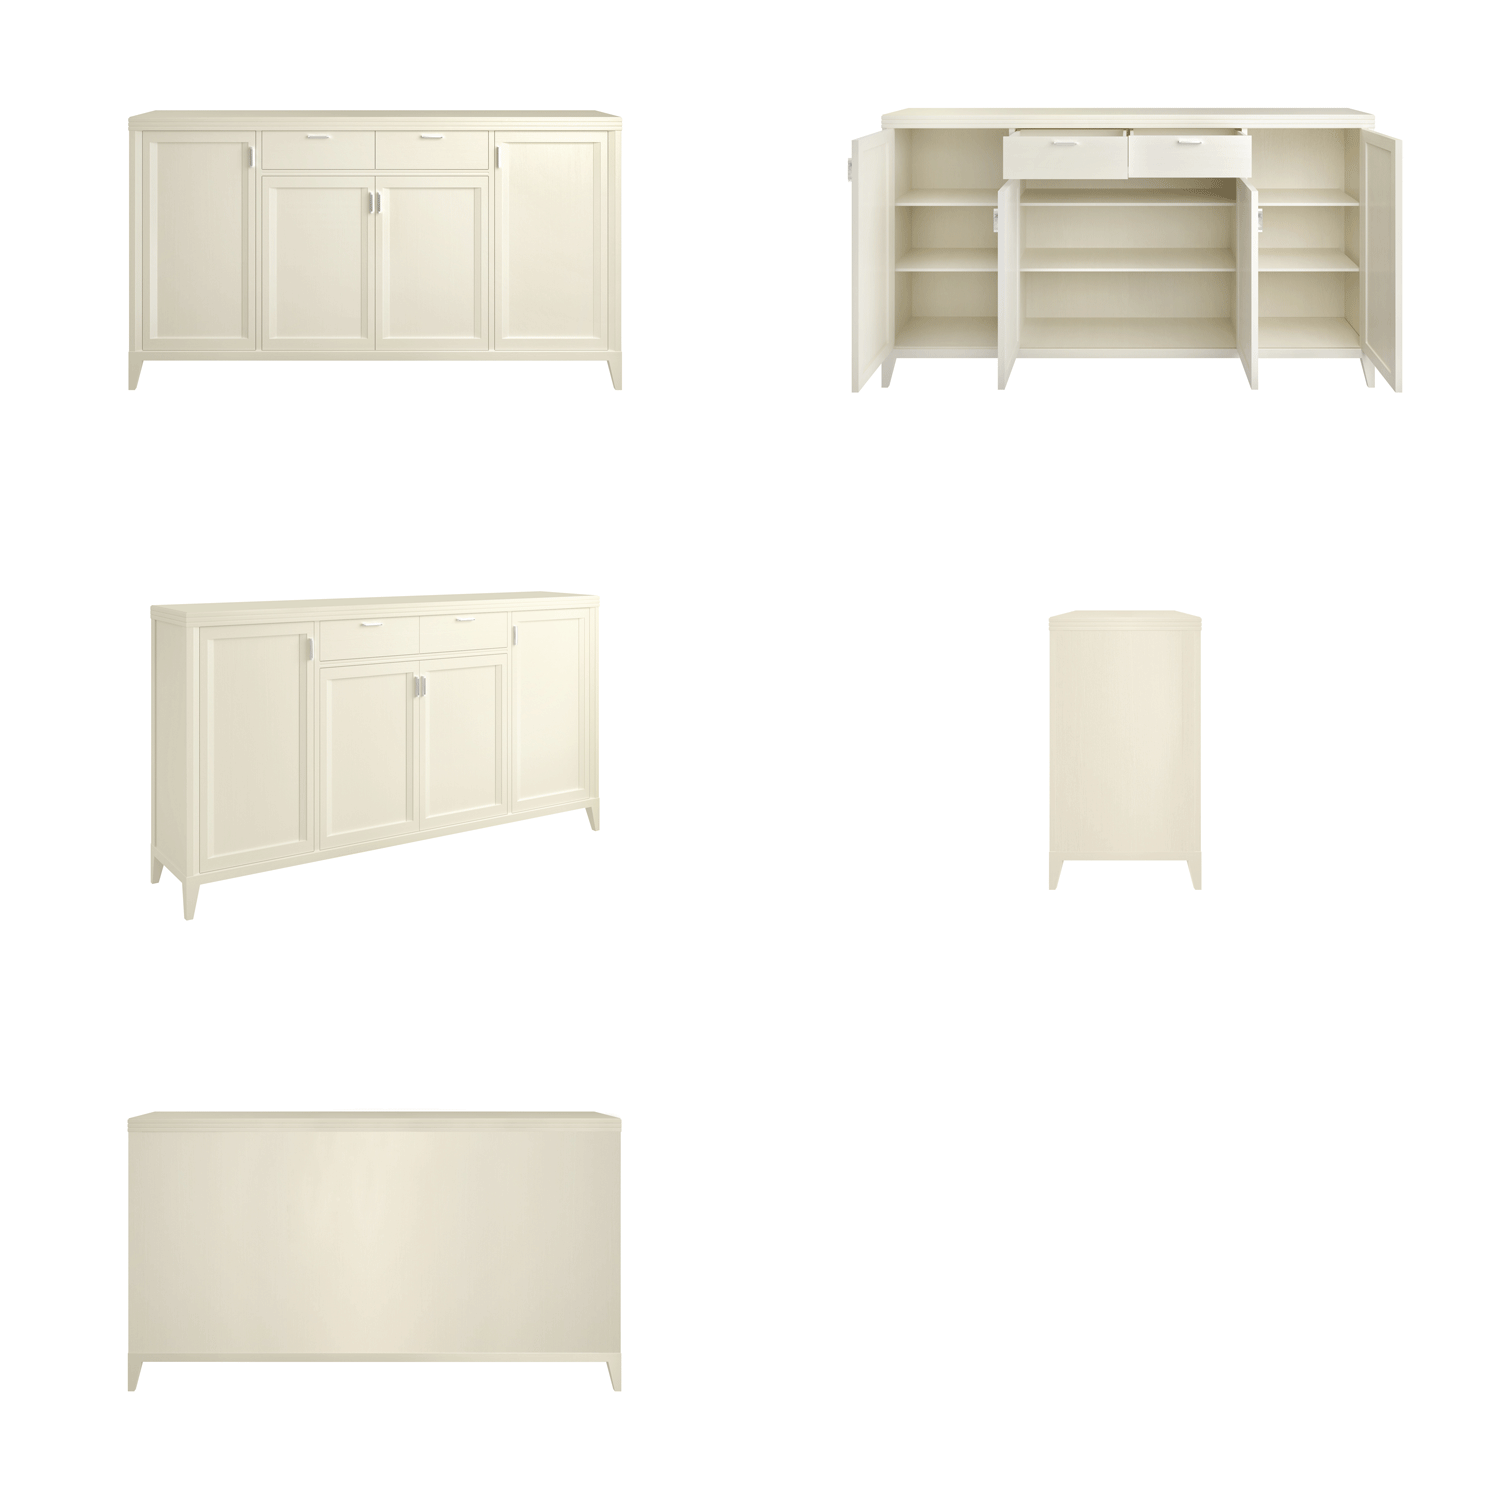
360 degree 3D photography: The product is photographed in 360 degrees on several levels. This means that in addition to a 360-degree view from the rotating product (1.), a complete view from above (in some cases also from below) is captured (2.). The end result can be moved 360 degrees to the left and right, as well as up and over a product. Such views are useful for products with interesting details both in the sides and on top, for example machine parts or also shoes. |
 |
360 degree 3D animated photography:
3D animation photography goes one step further and interactively shows how a product, for example, opens and closes, expands, configures and more. Such animations are very useful for highlighting details and features of a product, such as opening a drawer. They are based on several series of photos that show the various features and conditions of the product and are then stitched together.
This example shows a simple 360 degree 3D animated image. Since only five individual images are used for the rotation including the feature, the rotation is not as smooth as when using a higher amount of images.
How does 360 degree photography work?
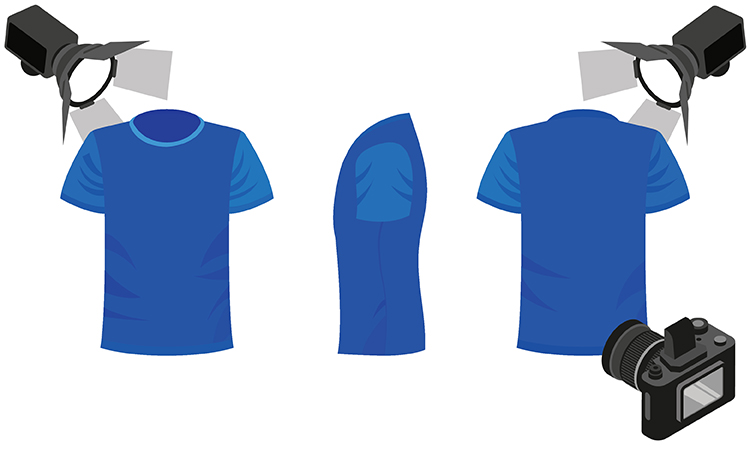
Let’s take a closer look at how a 360 degree photo is created. Basically, the product is rotated on its own axis, usually using special equipment, while a series of still images is captured. So instead of moving the camera around the product, the camera remains in a fixed position and the product rotates step by step in front of it and is photographed with each rotation. This makes it easier to ensure uniform lighting, the same angle and field of view, product positioning and more. This makes it easier to ensure uniform lighting, product positioning, camera angles, etc.
Let’s take a look at the basic steps in the process:
1. Fixed positioning of the camera on a tripod.
2. Placement and preparation of the product in front of a neutral, uniform background at the desired angle to the camera. Ideally on some kind of a turntable, professionals work with a special 360 degree photo turntable. When preparing the product, it is important to ensure that the product is not covered by holders and the like while it is being rotated. If this is not possible, holders etc. can be subsequently removed during image processing.
3. Adjust the lighting so that the product is evenly illuminated.
4. Taking photos: After each shot, the product is rotated a few degrees while its position is kept as centred as possible in the same spot. After the rotation, a new photo is taken.
5. This process is repeated until the product has been rotated a full 360 degrees around its own axis.
6. The result is a series of individual images that cover 360 degrees of the product.
7. Image retouching, colour correction, alignment, cropping and more are essential to get a perfect and uniform product presentation on all individual images. This is the only way to achieve a seamless result in the next step.
8. In the last step, the individual images are stacked together to an even rotation with the help of suitable processing and software and a perfect 360-degree visualization is created.
Many so-called 360-degree viewers offer the viewer additional options for interacting with the product and, for example, rotating it or zooming in on details.
How many images do I need?
Normally, between 24 and 72 single images are captured for one 360 degree visualisation. But it can also be less or significantly more; this essentially depends on the product itself or product category and the desired rotating smoothness.
Simple products with few details on the various sides usually require fewer images than complex products that have many details on all sides. With too few images, details are quickly lost. At the same time: the more images, the smoother the product rotation in the end result. However, this is also related to the product category. For some products, just a few images are enough for a good rotation, while the rotation of another product looks bumpy and uneven with the same amount of images.
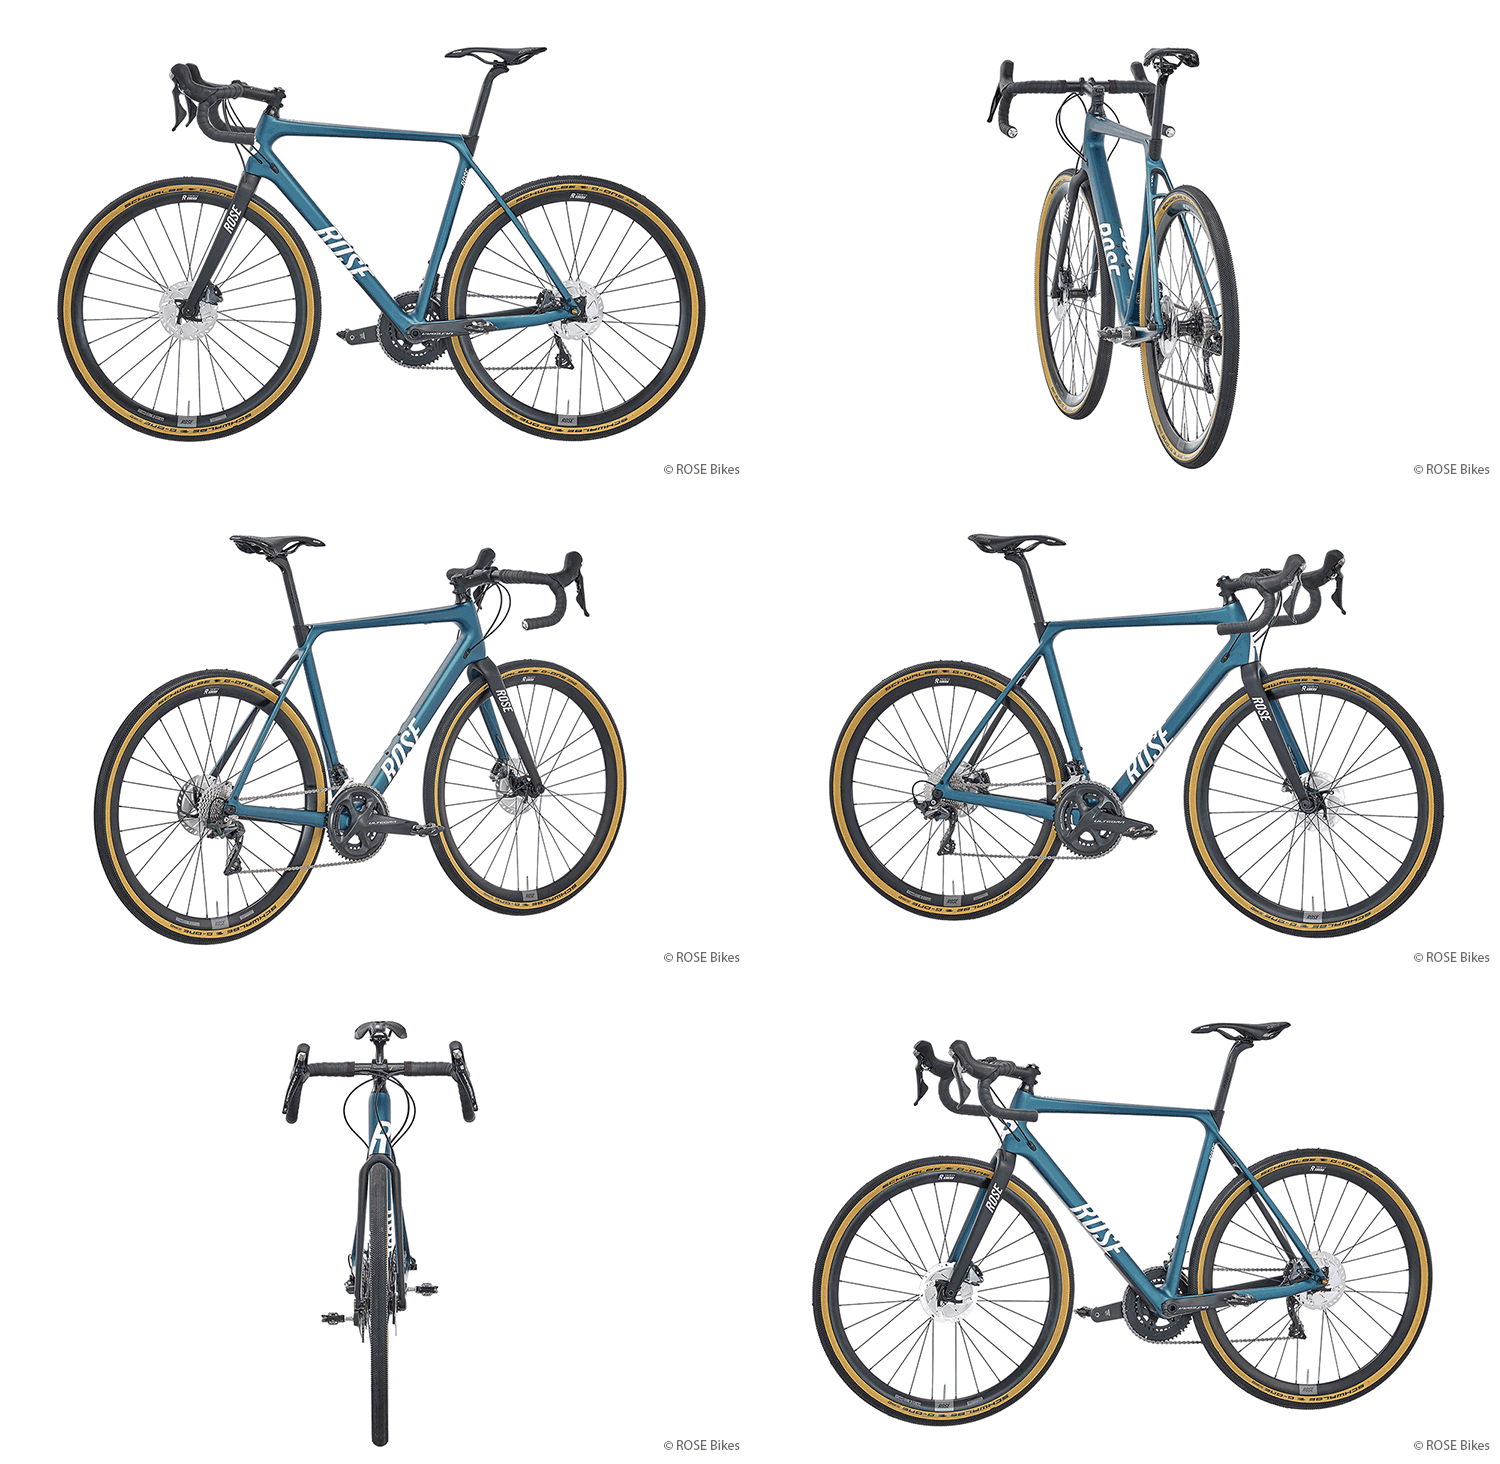
The above shown 360 degree image of a bicycle was created from 20 individual images.
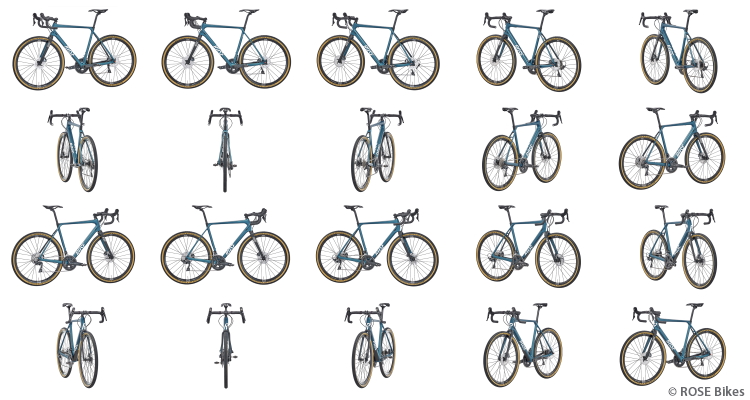
In general: The more complex the product, the more images are required. And the more images, the smoother and seamless the rotation and the customer experience. Depending on the data type of the end result, however, more images mean a larger data volume, which affects the loading time of the final 360 degree image.
360 degree images in CGI
CGI offers even more possibilities to create 360 degree visualisations and is a fantastic addition to “conventional” 360 degree photography. Based on photos, sketches, models, CAD data, etc., photo-realistic 3D views of a product can be created in CGI. Depending on how detailed and extensive the 3D model is, all sides of the product can be displayed with all details and features and, if desired, even animated. The finished CGI model can be viewed from every imaginable angle. Realistic lighting, shadows, colours and textures ensure that the difference to a real photo is barely noticeable or not at all.
We give your products the right spin!
With perfect 360-degree images in combination with professional image editing.
Our services include: clipping, alpha masking, masking, composing, ghost model, image retouching, colour correction, layout design, CGI for e-commerce, and more.
For more information, samples and detailed prices download our e-commerce & product images portfolio.
- 2023
- January (1)
- 2022
- December (2)
- November (1)
- October (2)
- September (2)
- August (1)
- July (1)
- June (1)
- May (1)
- April (1)
- March (1)
- February (1)
- January (3)
- 2021
- December (2)
- November (1)
- October (3)
- September (2)
- August (1)
- July (3)
- June (1)
- May (2)
- April (1)
- March (1)
- February (2)
- January (4)
- 2020
- December (2)
- November (3)
- October (4)
- September (1)
- August (2)
- July (1)
- June (2)
- May (3)
- April (3)
- March (3)
- February (4)
- January (4)
- 2019
- December (1)
- November (2)
- October (5)
- September (1)
- August (3)
- July (2)
- June (2)
- May (3)
- April (2)
- March (3)
- February (2)
- January (4)
- 2018
- December (2)
- November (2)
- October (3)
- September (3)
- August (2)
- July (2)
- June (2)
- May (1)
- April (1)
- March (2)
- February (3)
- January (2)
- 2017
- December (2)
- November (2)
- October (1)
- September (1)
- August (1)
- July (1)
- June (1)
- May (1)
- April (1)
- March (1)
- February (1)
